The older I get, the more self-conscious I get about skateboarding. It’s ironic, since the reason I started Gnarly Girls was to give myself and others the confidence to stop caring about what everyone else thinks. But lately, I’m feeling inhibition to the nth degree. I needed something to spark my bravery and inspire me to get back out and skate.
It’s questionable enough to be an adult poser at the skatepark, but to be an adult poser who rides on a rainbow sloth skateboard…? Yikes. It was time to leave my old design behind and upgrade to something a little more ~sophisticated~.
Enter: The Skateboard Makeover.
Before
STEP 1: SANDING
I wanted to keep a hint of the original design because I still like the colorful stripes mixed with natural wood. I covered my deck with paper bags, then started sanding.
STEP 2: PRIMER
After you covered areas you want to keep with painter’s tape, you can begin with the primer. Use a well-ventilated area, and protect yourself from the fumes. Safety first!
STEP 3: SKETCH
While I waited for the primer to dry, I messed with a few rough sketches to help finalize my design.
Rough sketch of my final selected design
Some designs that didn’t make the cut
STEP 4: STENCIL
Once the primer dries, you can stencil a design. I outlined squares with masking tape.
STEP 5: PAINT
I used acrylic paint because I already had it around the house and I wanted to give myself a bit more control painting by hand. You can also use spraypaint.
STEP 6: FINAL TOUCHES
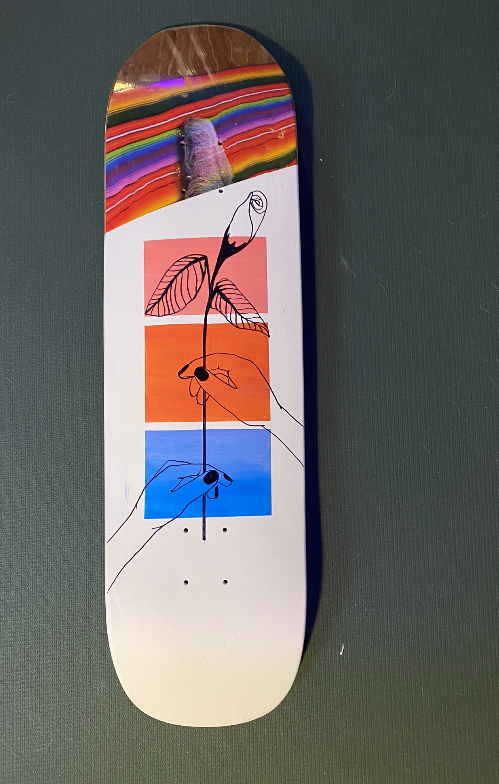
Once the paint dried, I drew a few more details using a Sharpie.
Finally, you’ll want to coat your deck with a sealer so your design lasts longer.
After
I still may not have top-notch skating skills, but at least now I have some style points. Here’s to getting back out there.
Tag @Gnarly.Girls on Instagram with your skateboard makeover!


